 WriterMorph
Help › Writing
The Editor
Format text, apply styles, add tables, images, comments and footnotes, and set up the page the way you like to write.
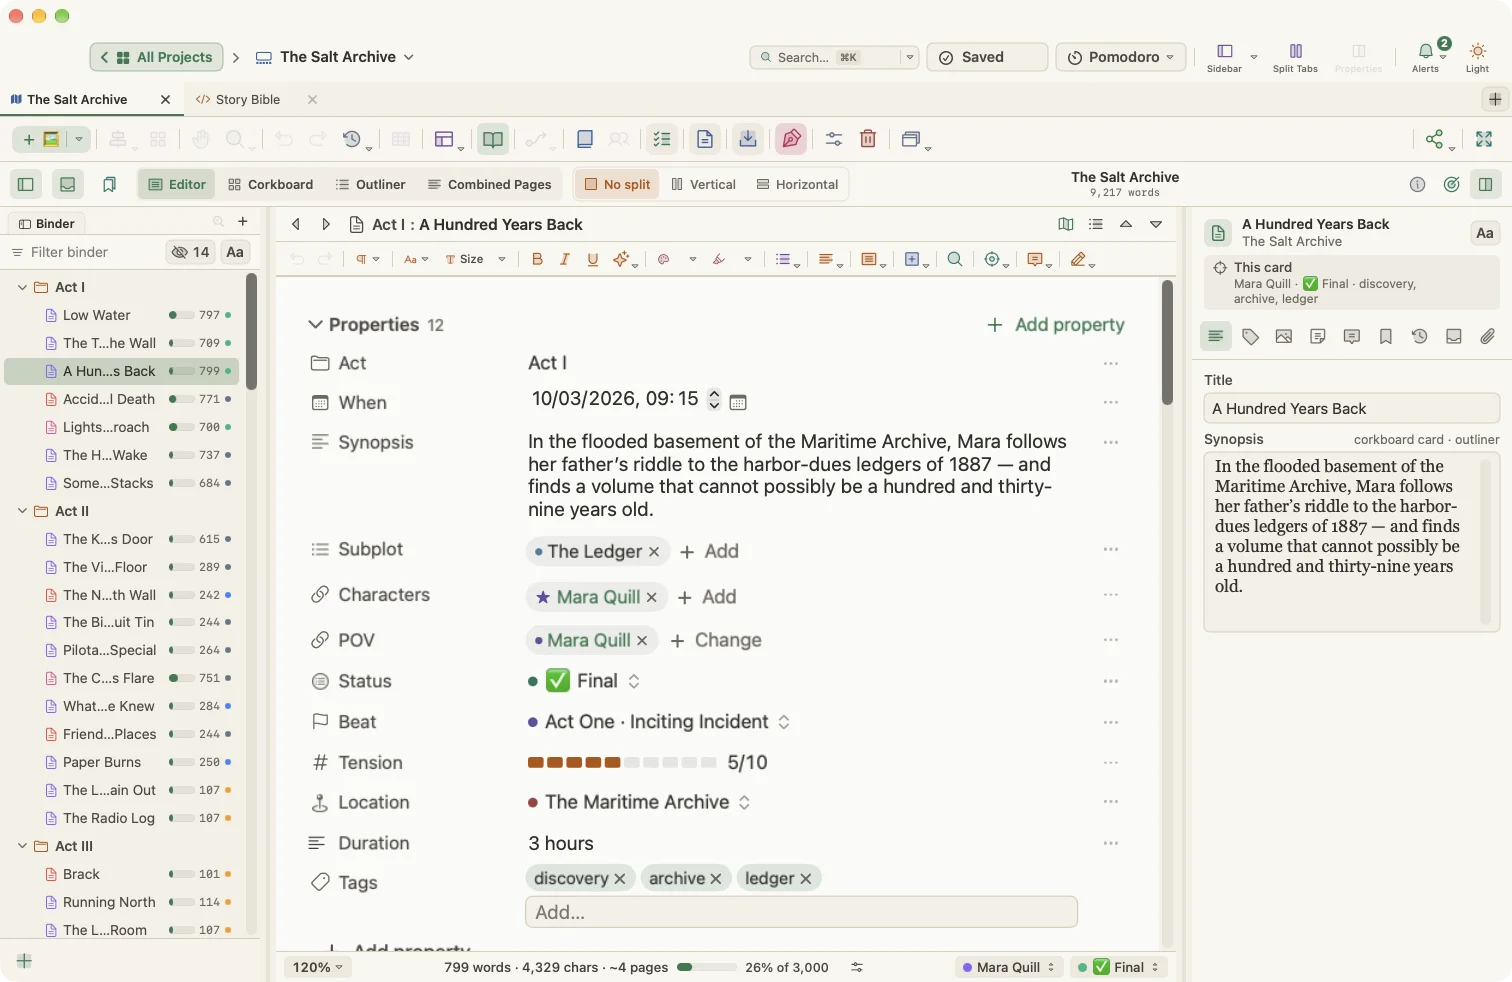
WriterMorph's editor is a native Mac rich text editor. You use the same editor whether you open a card from the canvas or a document in Manuscript Mode, so everything on this page applies to both.
The format bar
The format bar sits above the text. Its cells open small popovers for styles, fonts, sizes, colors and list styles, just like the format bar in other professional writing apps.
Two cells hold the less common commands:
- View ▾: paper, navigation, ruler, page view, focus, zoom, print and more.
- Notes ▾: comments and footnotes.
Bigger and Smaller live in the Effects ▾ cell.
Tip: Prefer a separate row for the view controls? Choose View › Toolbars › Show View Bar (separate row). To hide the format bar completely, choose View › Text Editing › Hide Format Bar.
Right-click the format bar and choose Customize Toolbar… to add, remove or reorder its items.
Basic formatting
| Shortcut | Action |
|---|---|
| ⌘B / ⌘I / ⌘U | Bold / Italic / Underline |
| ⇧⌘= / ⇧⌘- | Bigger / Smaller text |
| ⌘{ / ⌘| / ⌘} | Align left / Center / Align right |
| ⌘] / ⌘[ | Increase / Decrease indent |
| ⌃⌥⌘C / ⌃⌥⌘V | Copy / Paste Formatting |
The Format menu also has Strikethrough, Superscript, Subscript, Inline Code, Justify, Line Spacing (Single 1.0 to Double 2.5), Text Color, Highlight, Clear Formatting and Make Formatting Default.
Styles
Use Format › Style to apply a paragraph style:
- Paragraph (⌥⌘0)
- Heading 1, Heading 2, Heading 3 (⌥⌘1, ⌥⌘2, ⌥⌘3)
- Block Quote and Code Block
You can also build your own styles. Format some text, then use the styles popover in the format bar to create a New Paragraph Style from Selection… or a New Character Style from Selection…. Your styles appear under My Styles, where you can rename, redefine or delete them. Remove Style (keep formatting) detaches the style but leaves the text looking the same.
Lists and checklists
Format › Lists offers Bulleted List, Numbered List and Task List. Press Tab and ⇧Tab to indent or outdent a list item. Toggle Task Done ticks a checklist item. Insert › Task Checklist starts a new checklist.
Tables
Choose Insert › Table (3 × 3) to add a table. The Format › Table menu then lets you:
- Add a row above or below.
- Add a column to the left or right.
- Delete a row, a column or the whole table.
You can also toggle a header row from the table's context menu.
Images
- Insert › Image from File… (⇧⌘I) embeds a picture.
- Insert › Image Linked to File… shows an image that stays in its original location.
- You can also drag an image into the text or paste it.
Right-click an image to preview, copy or delete it.
Links
Insert › Link… (⌥⌘L) turns the selected text into a link to a web address. From the editor you can also link to a file (PDF, article, image) or to another card or document in your project.
Comments and footnotes
| Command | Shortcut |
|---|---|
| Insert › Comment | ⇧⌘8 |
| Insert › Footnote | ⌃⌘8 |
| Insert › Inline Footnote | ⌥⌘8 |
Comments and footnotes are listed in the Notes ▾ cell of the format bar and in the Comments tab of the Inspector, where you can edit or delete them in order. Choose Comments in the Margin to see comments beside the text, and Footnotes at the Bottom of the Page to see footnotes in page view. An inline footnote can be converted into a linked footnote.
Dates and other inserts
The Insert menu also adds a Horizontal Rule, the Current Date, the Current Date & Time (⌥⇧⌘D) and, while a video card is playing, a Media Timestamp (⌃⌥⌘T).
Page view, ruler and other view options
These live in the View menu and in the format bar's View ▾ cell:
- Page View: write on continuous paper or on real pages. Choose an office size (US Letter, US Legal, Executive, A4, A5, B5, A3), a book trim size (Pocket, 5 × 8 in, 5.25 × 8 in, Digest, 6 × 9 in, Royal, 7 × 10 in) or a Custom Page Size….
- Show / Hide Ruler (⇧⌘R) for tabs and indents.
- Typewriter Scrolling (⌃⌘T) keeps the line you are typing in the middle of the screen.
- Focus Mode dims everything except the current line, sentence or paragraph.
- Line Numbers shows a line-number gutter.
- Show / Hide Invisibles (⌃⌘I) reveals paragraph marks and spaces.
- Drop Cap enlarges the first letter of the first paragraph.
- Manuscript Format (Courier) shows the text in Courier, double-spaced.
- Zoom In (Editor) and Zoom Out (Editor) (⌘> and ⌘<) change the text scale on screen only; the document itself does not change.
Find and replace
- Edit › Find › Find… (⌘F) opens the find bar.
- Find and Replace… (⌥⌘F) adds a replace field.
- ⌘G and ⇧⌘G jump to the next or previous match.
The find bar has options for Match Case, Whole Word and regular expressions, and you can search the current document, the selection or the whole project. Use Replace, Replace & Find or Replace All.
Writing helpers in the Edit menu
- Spelling and Grammar uses the macOS spell checker (⌘: and ⌘;).
- Substitutions turns smart quotes, smart dashes and text replacement on or off.
- Transformations changes case: upper, lower, capitalized or sentence case.
- Text Tidying removes double spaces, trailing spaces and extra empty lines, and converts quotes,
...to ellipses and--to em dashes. - Copy Special copies the selection as HTML, Markdown or plain text.
- Paste and Match Style (⌥⇧⌘V) pastes without the source formatting.
- Speech reads the selection aloud using macOS speech.
Exporting or printing a single text
When you edit a card, the export button in the card editor prints or saves the current text as a PDF, or exports it as Word, HTML, Markdown or plain text. To print, use File › Print Current Document… (⌘P). To turn the whole book into a finished file, use Compile.