 WriterMorph
Help › Getting Started
Getting Started with WriterMorph
Install WriterMorph, choose where your projects live, create your first project and learn the basic idea of plan, write and compile.
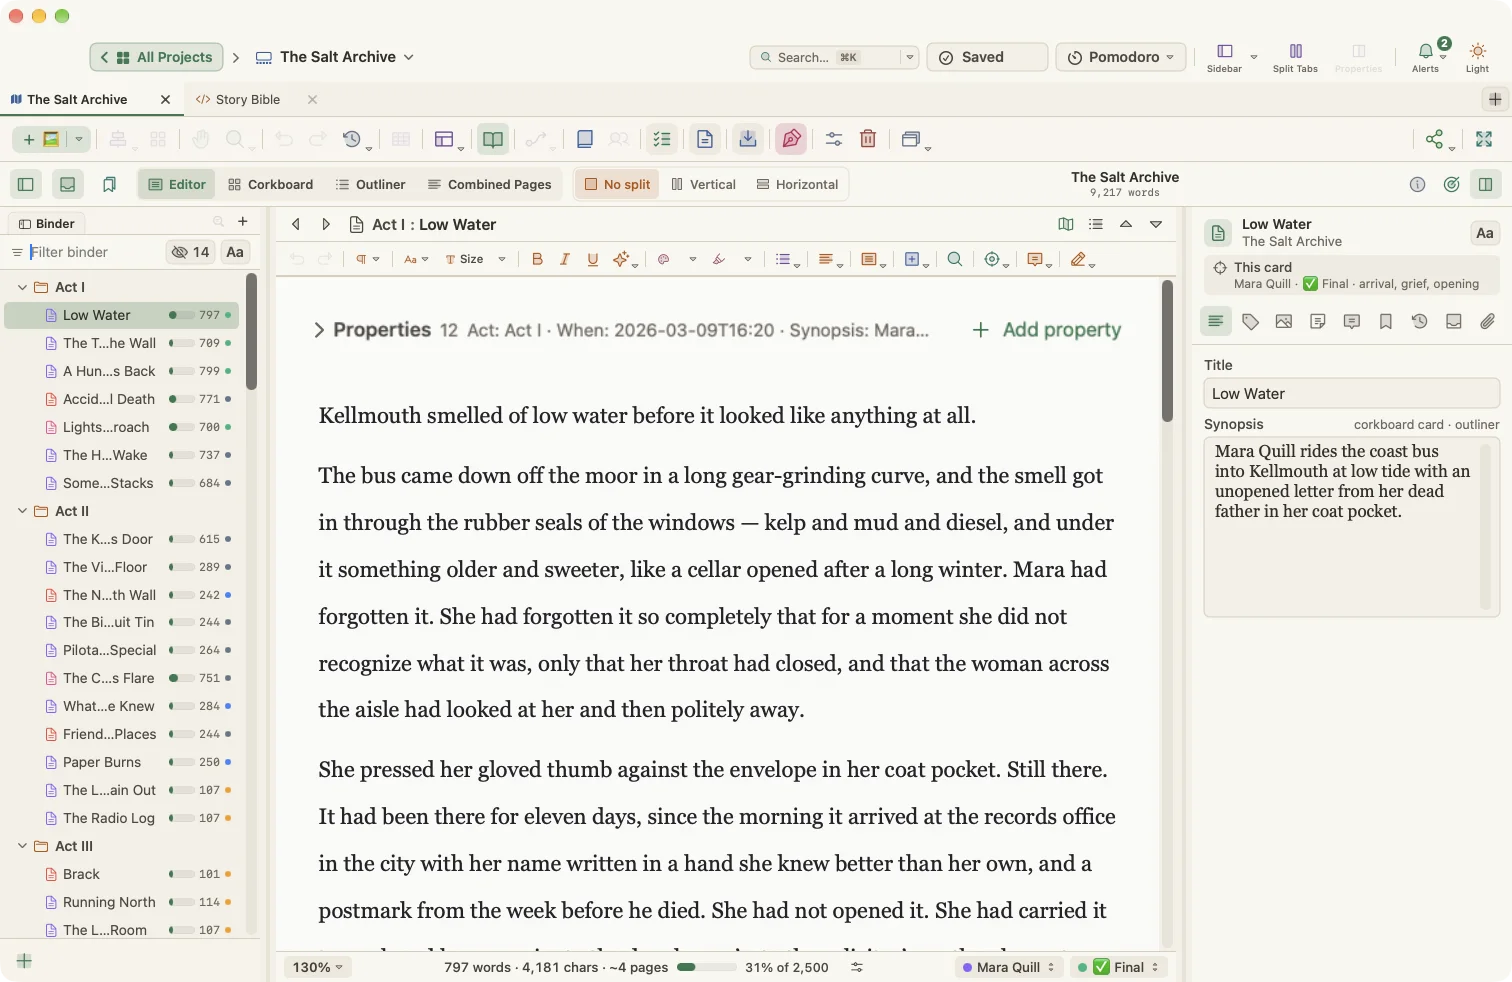
WriterMorph is a native Mac app for long-form writing. It brings four tools together in one window:
- a Visual Planner canvas for ideas, scenes, chapters and research,
- a Manuscript Mode with a binder, editor, corkboard and outliner,
- a Writer Timeline for story structure, plotlines and tension,
- a Compile Studio that turns your manuscript into PDF, Word, EPUB and more.
The key idea: one project, many views. The canvas, the binder and the timeline all show the same cards. Move a scene on the canvas and it moves in the binder; rename a chapter in the binder and the card updates on the canvas.
System requirements
WriterMorph requires macOS 15 Sequoia or later.
First launch
The first time you open WriterMorph, a short Welcome to WriterMorph sheet asks two questions:
- Where should your projects live?
- On this Mac: a library folder in your Documents folder.
- iCloud Drive: the same projects on every Mac signed in to your Apple account.
- Another folder…: for example Dropbox, an external disk or a shared folder.
- Appearance: Light or Dark. You can change this at any time.
You can change both later in Settings › General › Library and in the WriterMorph › Appearance menu.
Create your first project
- Choose File › New Project… (⇧⌘N) or File › New Project from Template…. The Project Templates window opens.
- Pick a category on the left, such as Fiction, Academic or Scriptwriting, and select a template. A description appears below the thumbnails. Choose Blank for an empty project.
- Click Create…, give the project a name and click Create.
Not sure where to start? Choose the Getting Started template. It is a ten-minute tour made of real cards that you can edit, move and delete.
Tip: Want to explore a finished project first? Open one from Help › Demo Projects. See Templates and Demo Projects.
Your first ten minutes
- Look at the canvas. Each card is a scene, section, note or character. Select a card and press Return to edit it.
- Switch to Manuscript Mode with ⌥⌘M. The same cards now appear as a binder on the left and a document in the editor.
- Write. Click a document in the binder and start typing. WriterMorph saves automatically.
- Try the other views. Press ⌘2 for the corkboard and ⌘3 for the outliner. Press ⌘1 to return to the editor.
- Open the Writer Timeline with ⌥⌘T to see your scenes on the Plot Board.
- Compile. When you are ready, choose Project › Compile… (⌥⌘E) and pick a preset such as Manuscript or E-book.
How your work is saved
- Each project is a single .wmorph file (a macOS package) that you can see in Finder, copy and back up.
- WriterMorph saves automatically a moment after you stop typing. ⌘S saves immediately.
- Automatic backups are on by default. See Projects, Files and Backups.
No account needed
WriterMorph works entirely on your Mac. There is no sign-up and no account, and your writing stays in files you own.
Next steps
- The WriterMorph Window: the Home screen, tabs, sidebar and panels
- The Visual Planner Canvas
- Manuscript Mode
- Keyboard Shortcuts